Motivation
My goal was to add a user-commenting capabilities to a blog, without having to pay monthly fees like Disqus. I also wanted to keep things as inexpensive as possible, so where possible no dedicated servers or traditional databases. Lastly, I wanted to do it all on Google Cloud Platform — I have had a good experience with deploying infrequently-used containerized applications using Cloud Run. Like Cloud Run, both BigQuery and Cloud Functions have a free-tier:
- BigQuery has 10 GB of free storage, plus 1 TB of queries free per month
- Cloud Functions has 2 million invocations per month, 400,000 GB-seconds memory, 200,000 GHz-seconds of compute time, 5 GB network egress per month
Configuring Access
To make things easy, I created a service-account specific to this micro-service. In the BigQuery console, I created a new data-set and tables, and selected the “Share Data Set” option, adding the service-account as an editor.
Accessing the Table in Python
To test your Python code locally, you can authenticate as the service-account locally by downloading a key. <img src=’
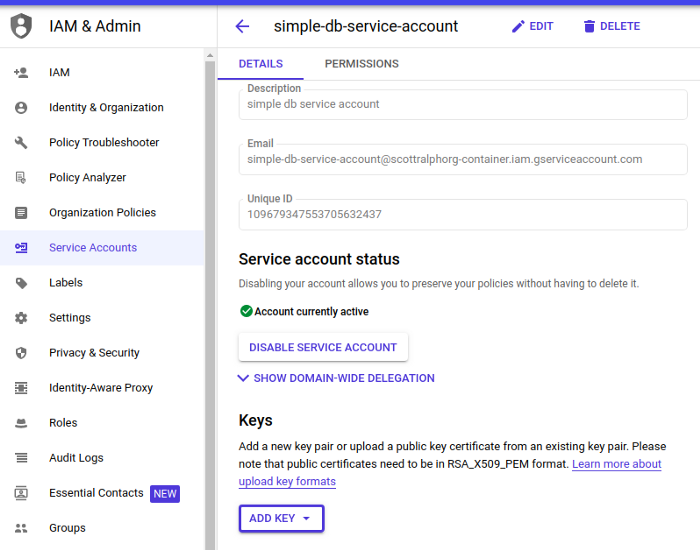 Adding a new key allows you to download the credentials as a JSON file.
The Google Cloud Python libraries will use this JSON file if you set the
environment variable:
export GOOGLE_APPLICATION_CREDENTIALS=PATH_TO_YOUR_KEY.json
This can also be set up nicely in PyCharm. The python code for accessing the table is very straightforward, the excerpt below gives you an idea:
from google.cloud import bigquery
from google.cloud.bigquery import DatasetReference
gcp_project="YOUR_GCP_PROJECT"
dataset_id="blog"
table_name="comments"
client = bigquery.Client(project=gcp_project)
dataset_ref = DatasetReference(dataset_id=dataset_id,\
   project = gcp_project)
table_ref = dataset_ref.table(table_name)
table = client.get_table(table_ref)
query = f"select * from `{gcp_project}.{dataset_id}.{table_name}` limit 10"
job = client.query(query)
result = job.result()
for row in result:
   print(row)
Running this script ensures that BigQuery is set up correctly, and the service-account can access it. Now we need to package this code in a Cloud Function.
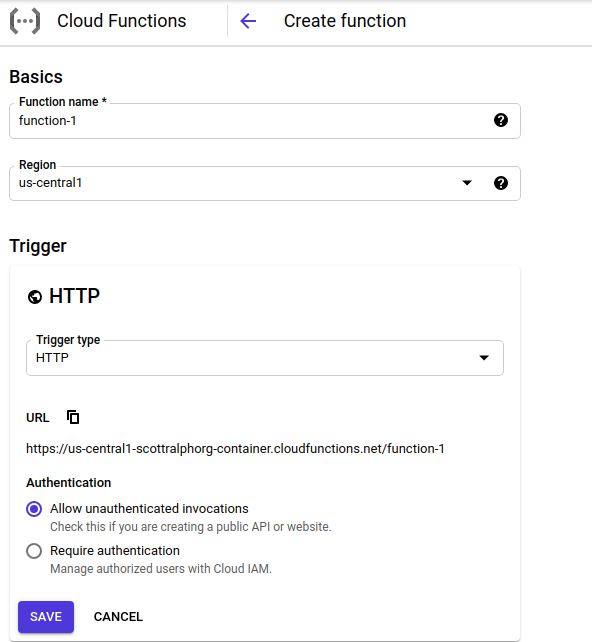
These options are straightforward — I chose to allow unauthenticated invocations, but that’s up to you. After you save, there are some more options:
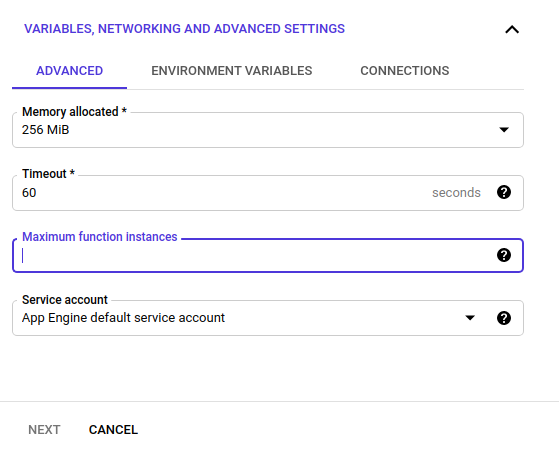
Here you can specify the memory, timeout, and maximum number of instances. The important bit here is that by default the options for Service Account is “App Engine default service account”. You want to change this to be the service account you created to give permissions to the Big Query data set.
On the next pane, you now specify the Python code for the Cloud Function:
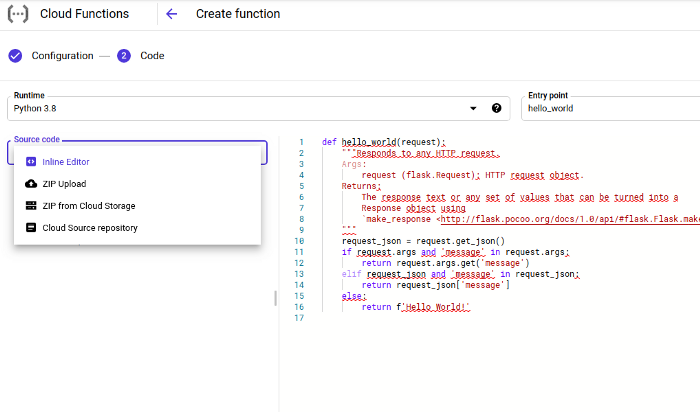
You specify that you want the runtime environment to be Python 3.x, and give the name of the function that will field the request, in this case “hello_world”. For many Cloud Functions we might get away with using the inline editor option, and just specifying the code. In our case, unfortunately, we have to specify the source from a ZIP, owing to the fact that the Google Cloud BigQuery library is not pre-loaded on the platform, and we must provide it ourselves.
For this we have to create a ZIP file with the following structure:
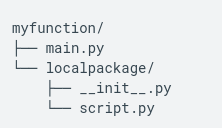
where our “hello_world” function is assumed to be in the “main.py” file. All library files are expected to be in their own directory that is a sibling of the main script.
The only library dependency we have to worry about is google-cloud-bigquery. To get this library in a local file, create a new directory for staging the artifacts, as well as the main.py.
% mkdir staging
% pip install google-cloud-bigquery -t staging
% cd staging
% cp main.py .
% zip cloud-function.zip *
The “-t” option ensures that the libraries are placed in the directory specified. Note that the staging directory contains a lot of files, since it also brings in all of the libraries on which google-cloud-bigquery depends.
Deploying the ZIP file
From the drop-down list in the cloud function console you can choose:
- To upload the ZIP file directly, also specifying a Google Storage-Bucket as a staging location. This requires the extra step of creating your own staging storage bucket beforehand, or
- To directly reference a ZIP file from a staging storage bucket
Testing
For my testing, I used Postman and authored a GET HTTP Request. Y ou can directly author the JSON arguments to the request, submit the request, and then see the JSON response.